

Create stunning pressed flower art on black mat board with friends! This easy craft night idea turns dried flowers and glue into beautiful botanical arrangements that look like they belong in a gallery.
Pressed flower art was instant love at first sight
I host monthly-ish craft nights at my home, but I also have a couple of friends who I meet up at local coffee shops with for “crafternoons.”
Recently, my amazingly talented, genius, creative friend Jenni came up with this project. She set it all up, grabbed us coffees, and we crafted for hours on the outdoor patio of my favorite coffee shop.
And because I loved it so, so much, I knew I had to do it again. I needed to make more. So, this was the project for my next Craft Night at my house and it was a hit.
✂️ I LOVE hosting craft nights with girlfriends! Check out these adorable award badges we made recently!
Why pressed flower art makes the perfect craft night project
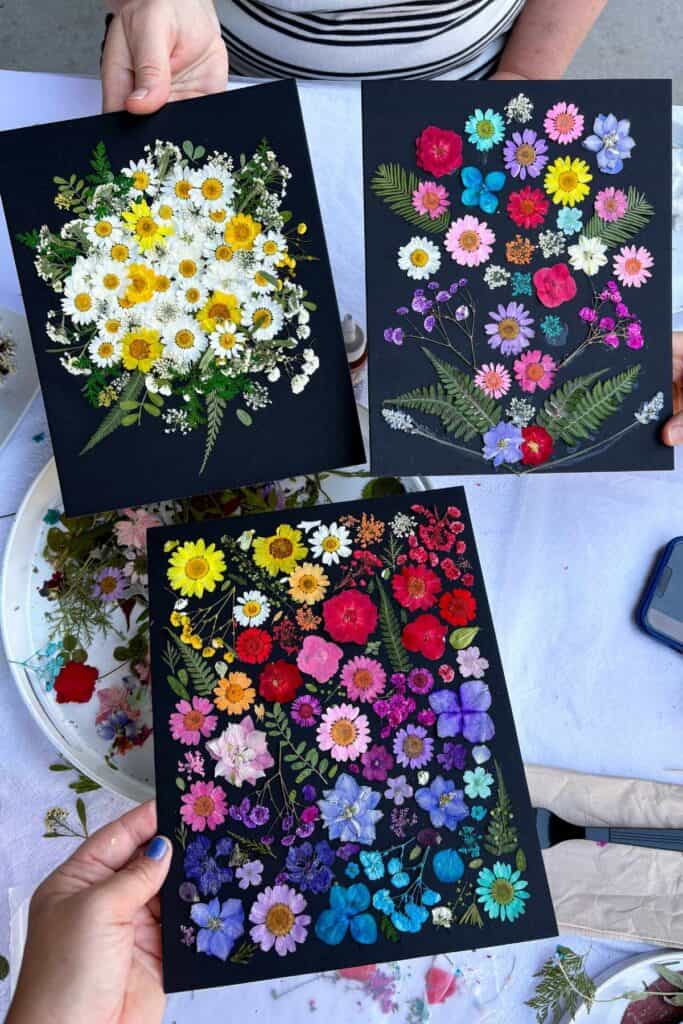
There’s something about making art alongside friends that makes the whole experience better. The conversation flows, everyone makes slightly different choices, and by the end of the night you get to look around at a table full of completely unique pieces — same materials, totally different results.
That’s exactly what happens with dried flower art, and it’s one of the reasons it works so well as a group activity.
The format is also ideal for a mixed group. Whether your friends are naturally artistic or swear they “can’t do crafts,” this project levels the playing field. There’s no cutting, no sewing, no precision required. You lay flowers on a board, move them around until you love how they look, and glue them down.
Looking for more flower crafts, but for kids?
- Doodle flower gardens
- Sunflower printmaking with cardboard
- Fresh flower water table
- Flower cutting bin


Materials needed
- Dried flowers – one set can easily make 4ish pieces of art
- 8×10 black mat boards
- Glue
- Craft tweezers


How to make pressed flower art
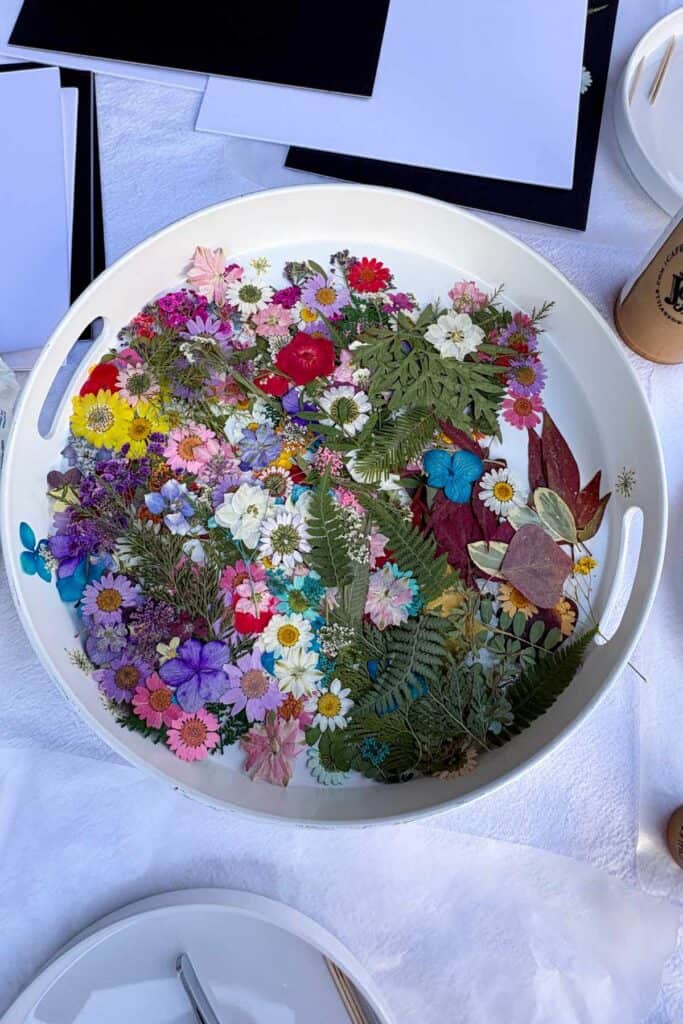
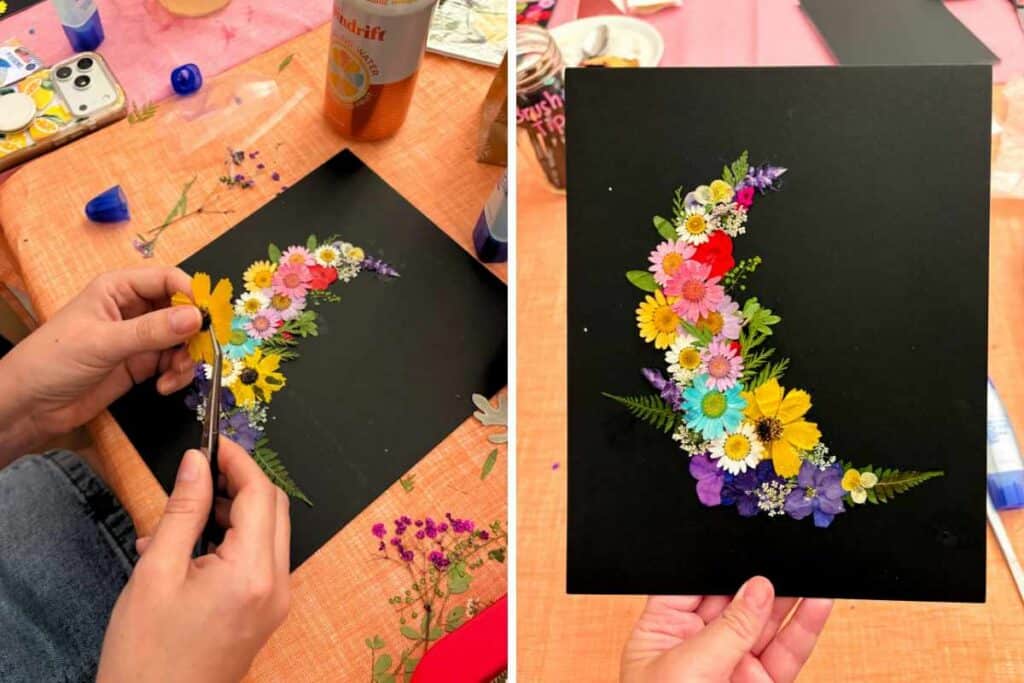
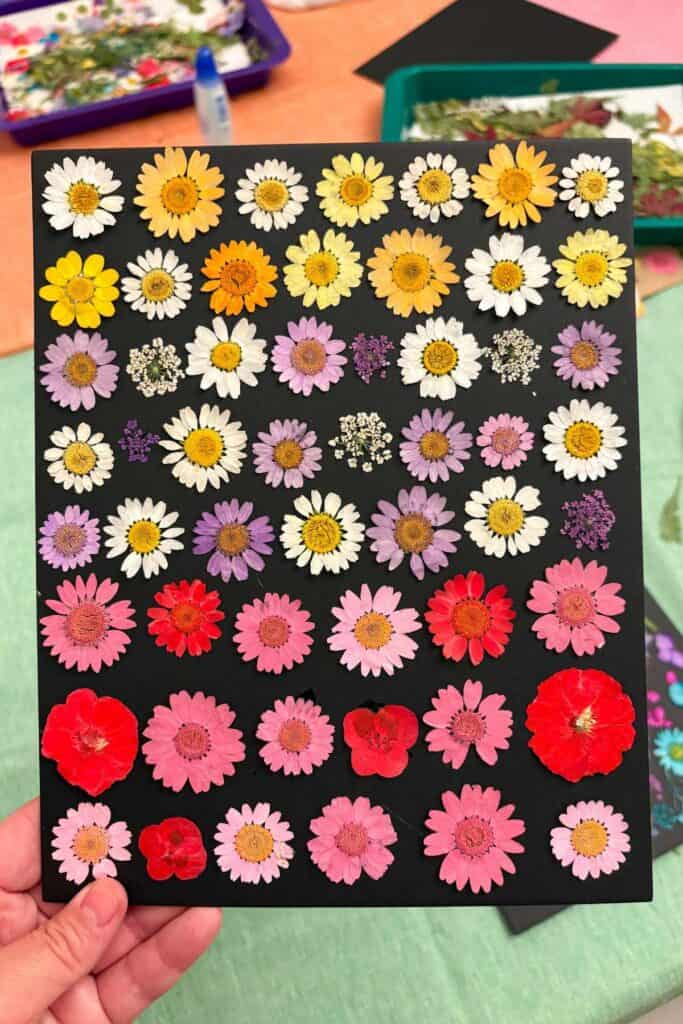
- Lay flowers down
- Before touching the glue, arrange all your dried flowers on the black mat board exactly how you want them. Move things around, try different placements, and don’t commit until you’re happy with how everything looks.
- Tip: Taking a quick photo on your phone as a reference before you start gluing is a great idea.
- Glue everything down
- Working one flower at a time, lift each piece, apply a small amount of glue to the back, and press it back into place. Most people keep everything in a single flat layer, but feel free to layer a few pieces on top of each other for added dimension.
- Let it dry
- Set your board flat and let it dry completely. That’s it. Your dried flower art is ready to frame and hang!
Tips for the best dried flower art results
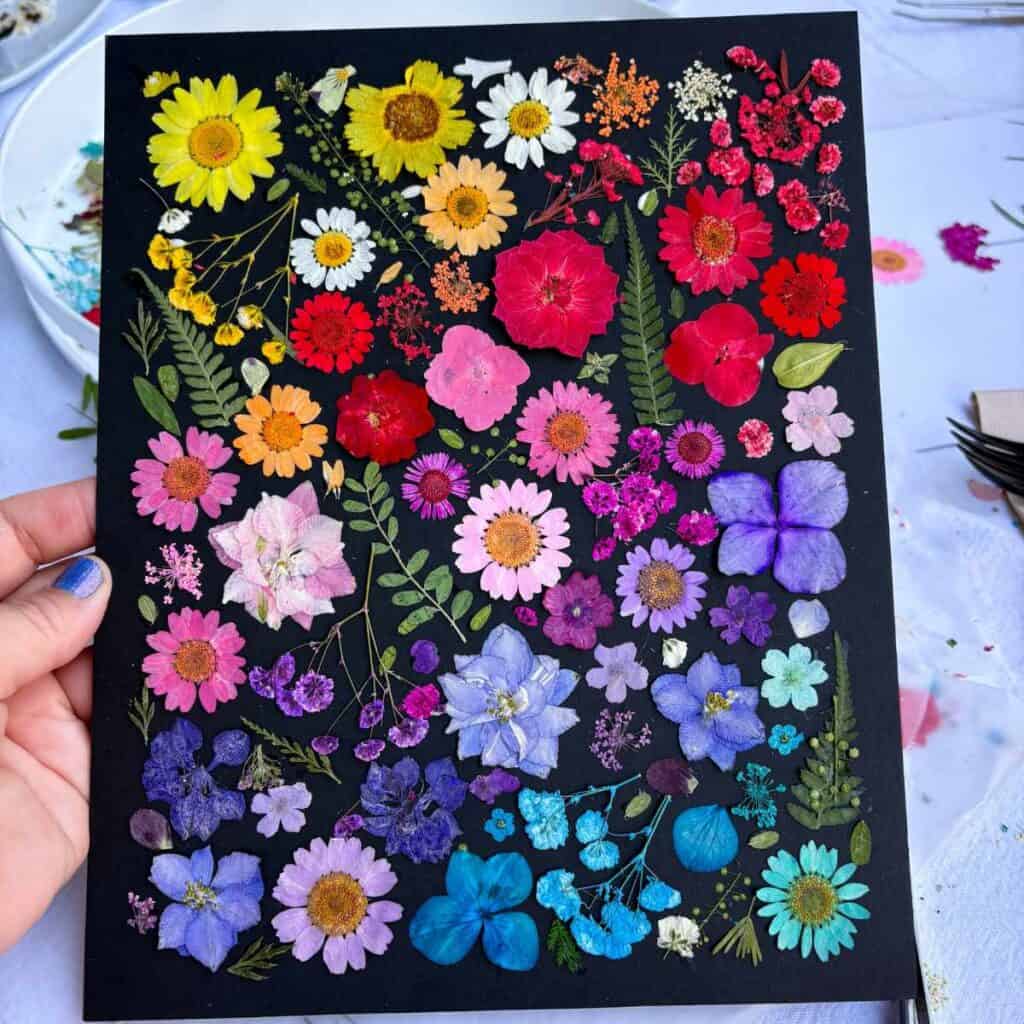
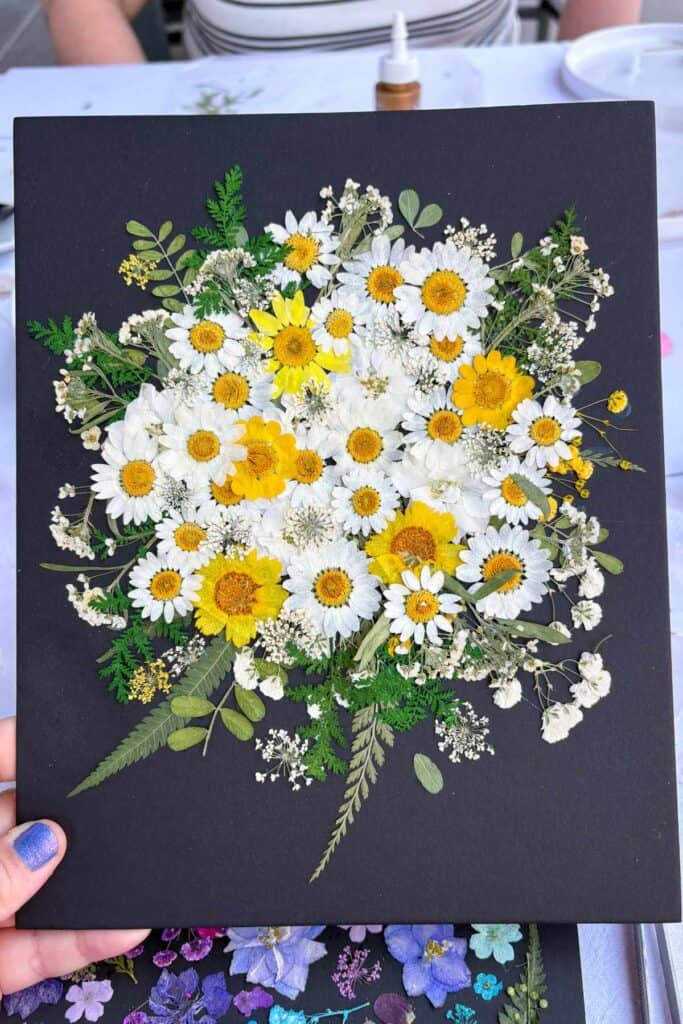
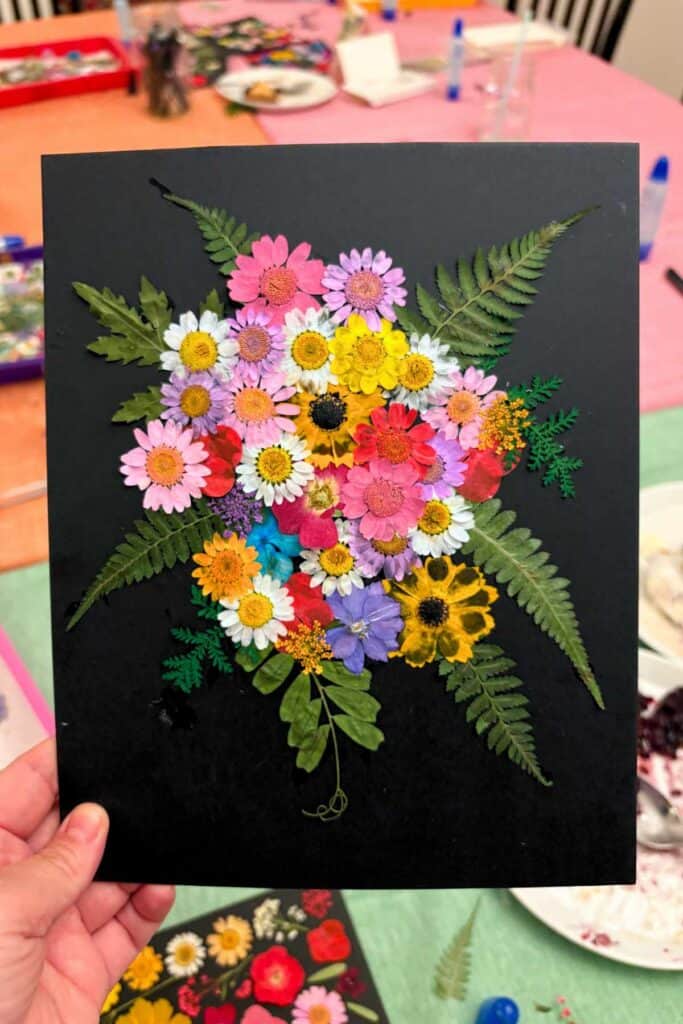
- Black mat board is the secret weapon. The dark background makes every color and texture in the dried flowers pop in a way white or kraft board simply can’t match.
- Use less glue than you think. Too much can seep out around the edges of petals. Small dots and thin lines are all you need.
- Tweezers are your best friend. For tiny blooms and fine stems, tweezers give you far more control than your fingers and helps you avoid accidentally breaking flower petals.
The best part? Everyone goes home with something beautiful!
What makes this craft night idea so special is that the finished pieces genuinely look like art.
Not “cute craft project” art, but actual, frame-it-and-hang-it art.
The black mat board gives every arrangement a gallery-quality backdrop, and because each person makes their own choices about color and composition, every piece is completely one of a kind.
It’s also a craft that works in any season. Spring wildflowers, summer roses, autumn grasses and seed pods, winter eucalyptus — dried botanicals come in endless varieties, so you can change up the palette and mood every time you host. Do it once and you’ll be planning your next seasonal version before the glue is even dry.
Happy crafting! 🌸
Frequently Asked Questions
You can order dried flower assortments online through Amazon, Etsy, or specialty floral suppliers. Etsy in particular has a great selection of pre-curated bundles in specific color palettes, which makes it easy to plan a cohesive look before your craft night.
Of course! It’s also really easy to find these in white.
The first time I did this, we used tacky glue. The second time, we used this glue. Both worked great!


LEAVE A COMMENT