

These DIY award badges are the cutest craft you didn’t know you needed with glitter foam, letter beads, jewels, and ribbon fringe stacked into the most gorgeous little medallions ever. Make them for yourself, friends and family, your whole classroom, or for a hands-on activity at your next birthday party!
- DIY Award Badges Are the Craft Everyone Needs Right Now
- What Are DIY Award Badges?
- Materials
- How to Make DIY Award Badges
- The Ribbon Fringe Tail Is Everything and Here’s How to Make It Look Amazing
- 20 Funny and Heartfelt DIY Award Badge Ideas
- Why Handmade Badges Make the Best Gifts
- Frequently Asked Questions
DIY Award Badges Are the Craft Everyone Needs Right Now
You cannot imagine how excited I am to share these adorable, creative, hands-on, sparkly badges.
Last week, some friends came over for craft night and we sat around the table with glitter foam and rhinestones and hot glue and made ourselves the most adorable badges you have ever seen.
We made them for ourselves.
We made them for friends and family.
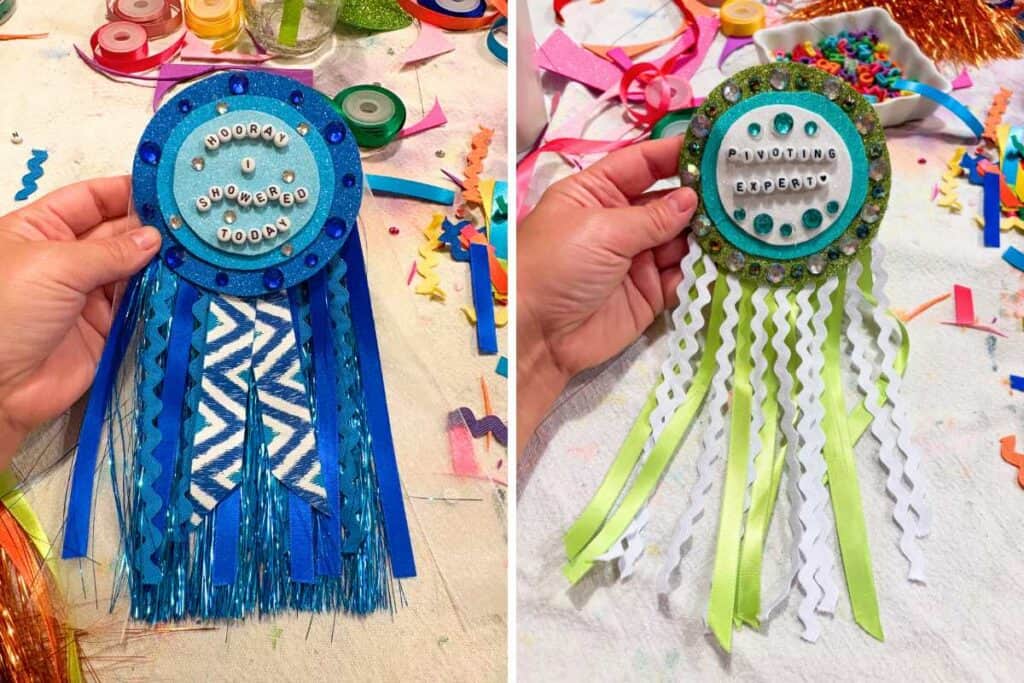
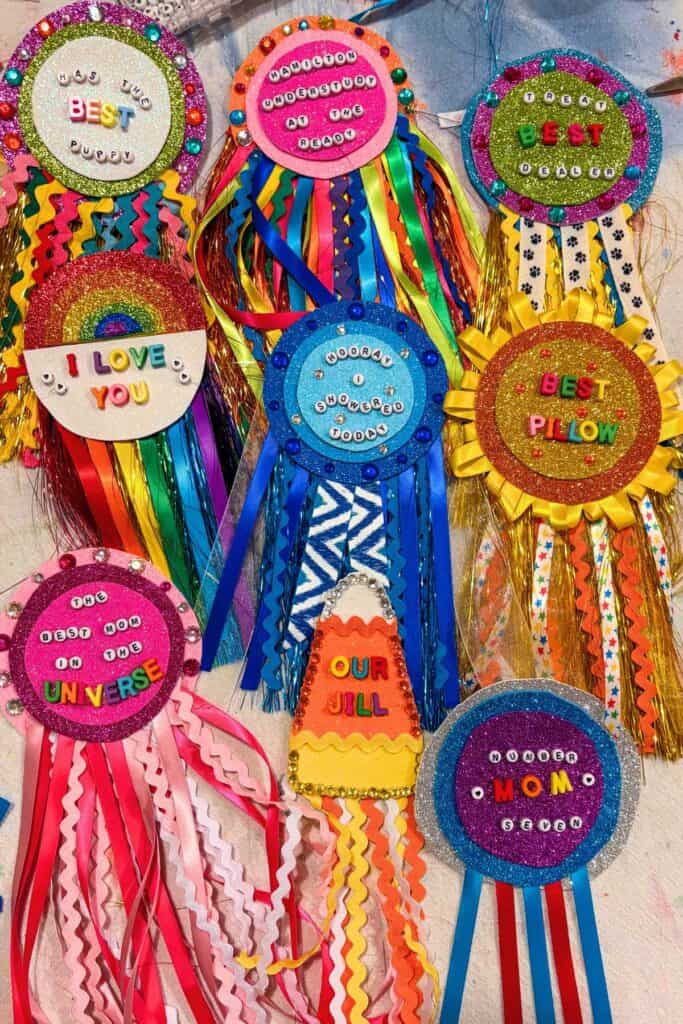
One friend made a “Hooray I Showered Today” badge in three shades of blue glitter foam with tinsel fringe and rhinestones and it is, genuinely, a work of art.
These DIY award badges are silly and sweet and totally customizable, and they work for literally every age, occasion, and skill level.
What Are DIY Award Badges?
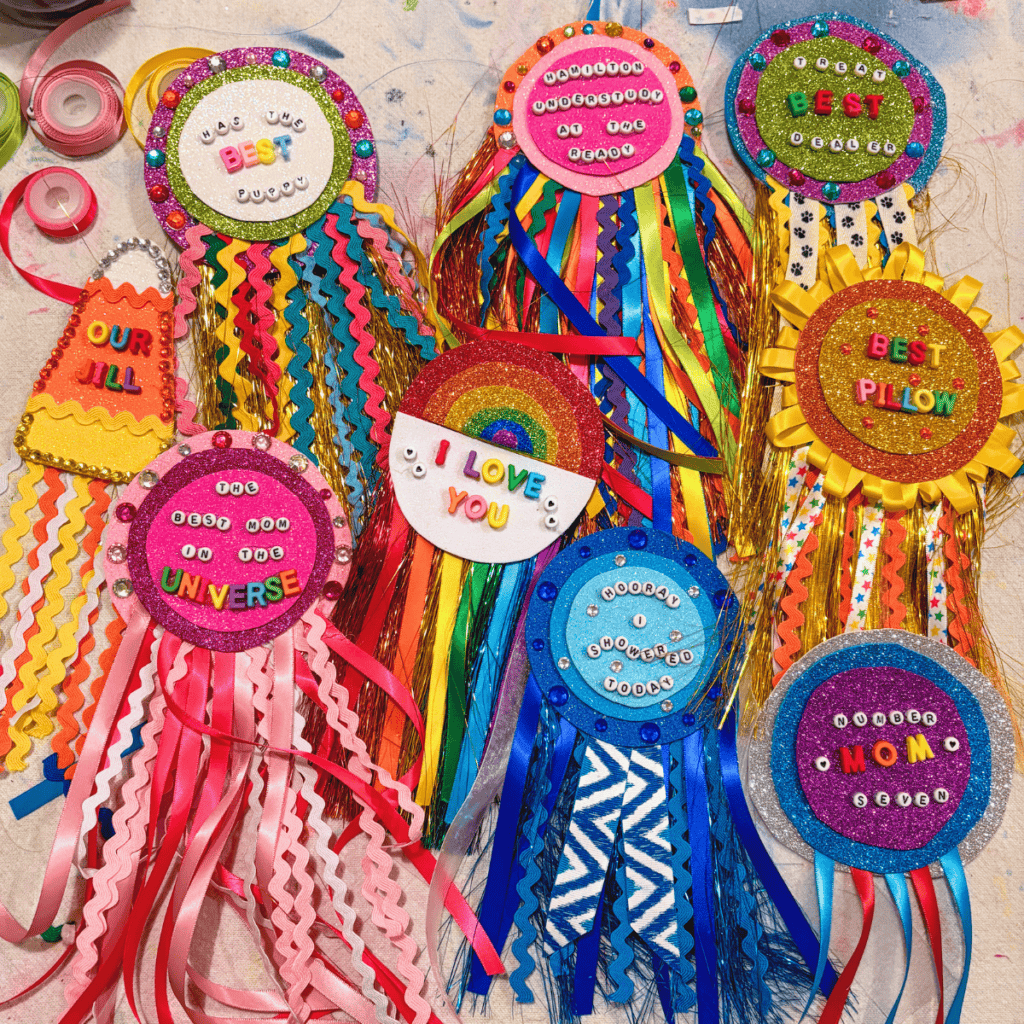
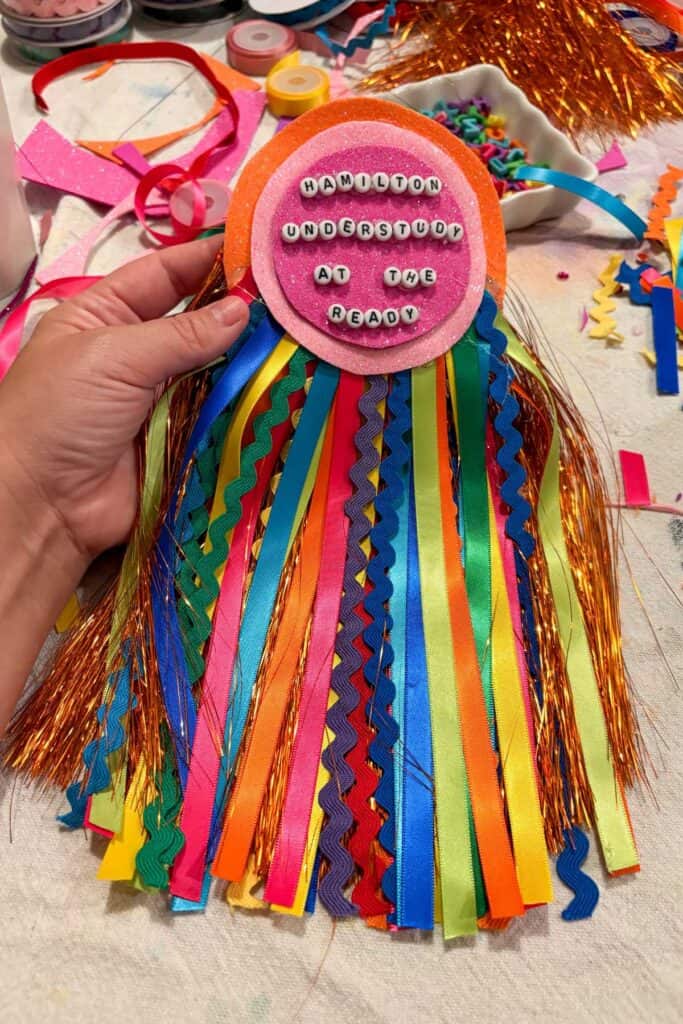
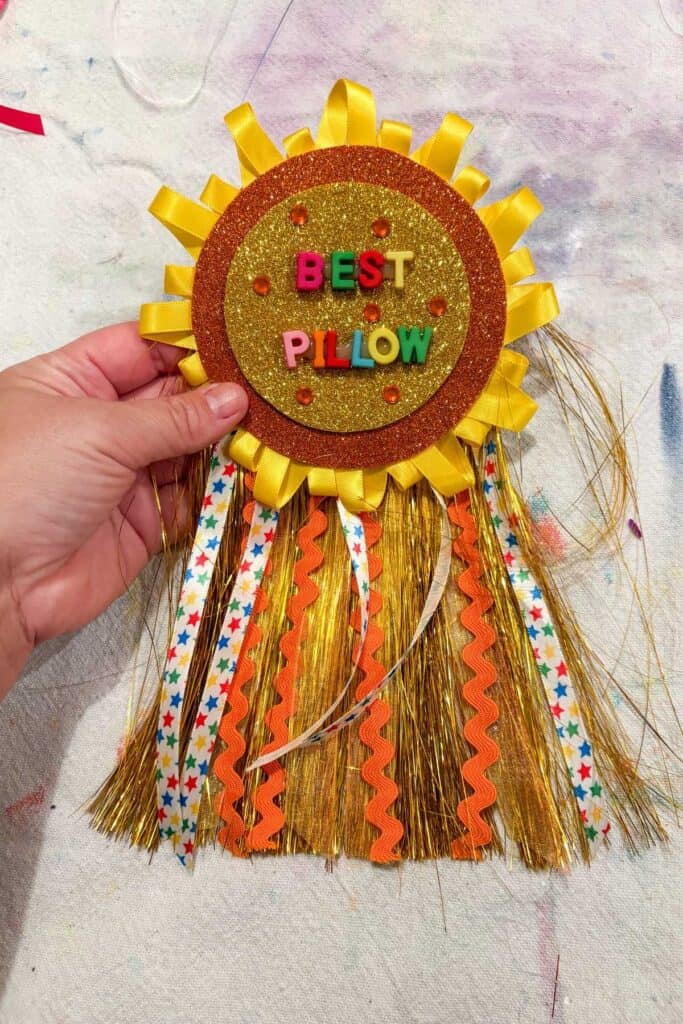
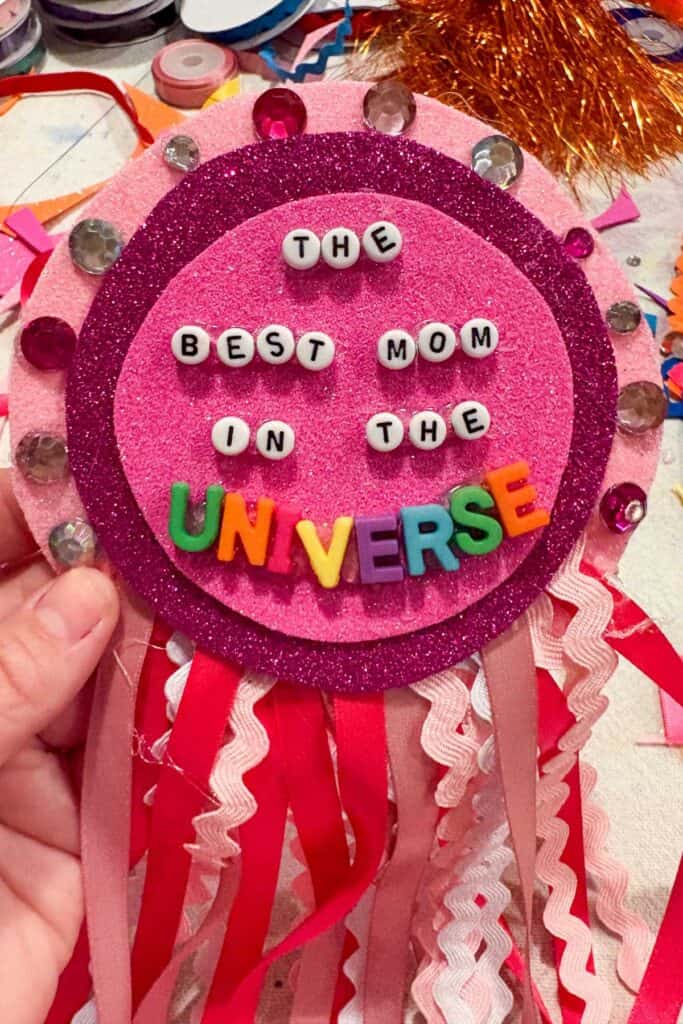
DIY award badges are handmade medallion-style pins that look just like a real award ribbon with layered glitter foam circles, a cascading ribbon and tinsel fringe tail, and a personalized title spelled out in letter beads right in the center.
Think “World’s Best Dog Mom” or “Chaos Coordinator” or “Hamilton Understudy at the Ready.”
They’re made from simple craft supplies and a hot glue gun, and they come together in about 20-30 minutes. They’re part craft, part inside joke, part heartfelt gift, and 100% guaranteed to make someone’s day.


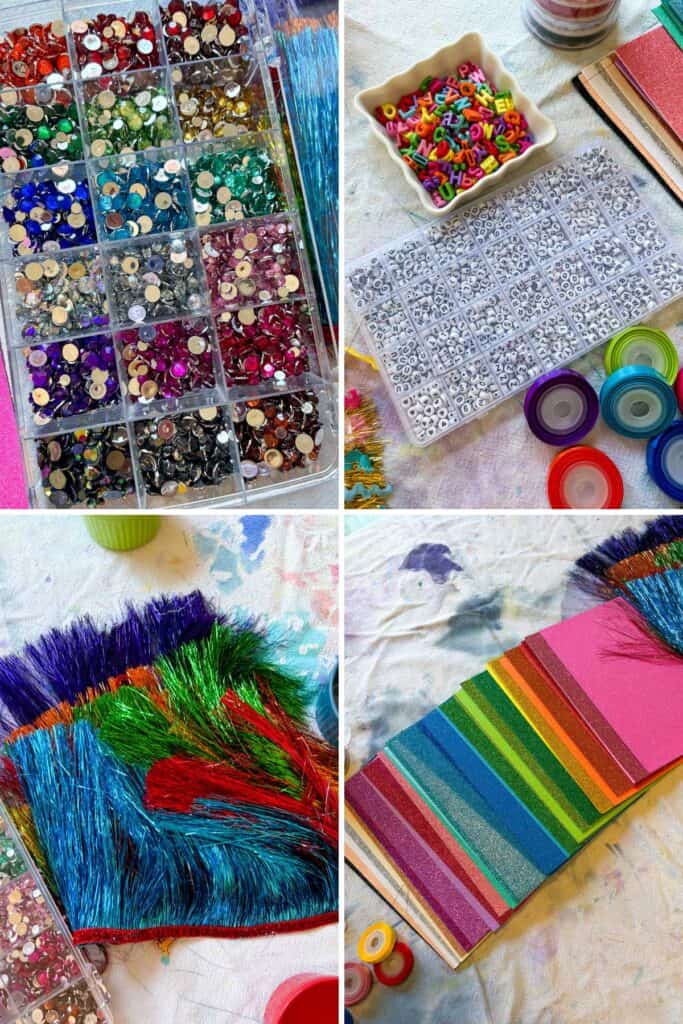
Materials
Friends Art Lab is a participant in the Amazon Services LLC Associates Program, an affiliate advertising program. As an Amazon Associate, I earn from qualifying purchases. Read more about these links in my disclosure policy.
How to make the badge base:
- Glitter foam sheets – they’re glittery one one side and non-glittery on the other
- Scissors
For the fringe and ribbon tail:
Decorations:
- Black and white letter beads
- Colorful letter beads
- Rhinestones and jewels in various sizes
- Hot glue gun and glue sticks
How to Make DIY Award Badges
Make your badge base:
- Cut three circles from glitter foam in three graduating sizes: small, medium, and large.
- Hot glue the circles together so they sit centered on top of each other.
Make the ribbon tail:
- Cut your ribbons, tinsel fringe, and ric rac into strips of similar length. Lay them out side by side before gluing so you can play with the arrangement (mixing textures and patterns is what makes the fringe tail look so gorgeous).
- Bundle your ribbon strips together and hot glue them to the back of your largest foam circle so they hang down below the badge.
Add your message:
- Spell out your award title using letter beads and arrange them on the front of your badge before gluing so you can play with the spacing and layout. Once you’re happy with it, hot glue each bead down.
- Fill in the remaining space with rhinestones and jewels.
Optional – Add a pin:
Hot glue a pin back to the back of the badge so it can be worn with pride, or skip the pin and display it somewhere it can be admired every single day.


The Ribbon Fringe Tail Is Everything and Here’s How to Make It Look Amazing
Can we talk about the ribbon tail for a second? Because this is the part that takes these badges from cute to absolutely jaw-dropping.
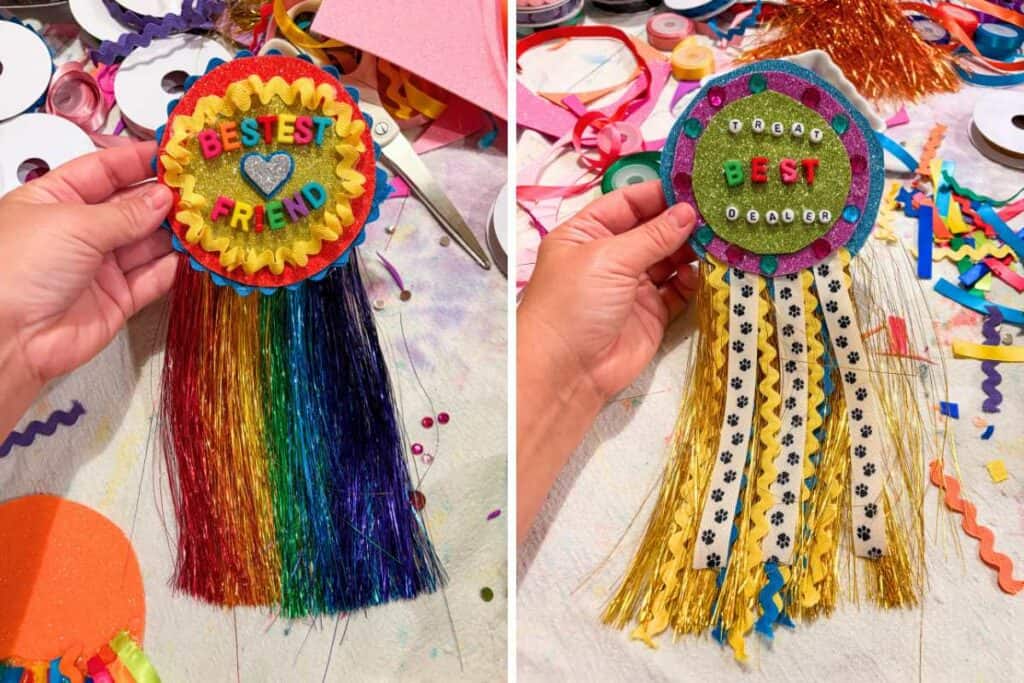
The secret is mixing different textures and ribbon types. Satin ribbon, tinsel fringe, ric rac trim, patterned ribbon…the more variety you layer in, the more incredible it looks.
Match your ribbon colors to your foam colors for a super cohesive look, like the “Hooray I Showered Today” badge that used every shade of blue ribbon imaginable including a gorgeous blue and white chevron ribbon right in the center.
Or go full rainbow like the “I Love You” badge, where every color of ribbon and tinsel hangs down like an actual rainbow.
20 Funny and Heartfelt DIY Award Badge Ideas
Stuck on what to write? Here are some ideas:
For adults:
- Hooray I Showered Today
- Chaos Coordinator
- Most Likely to Fall Asleep During a Movie
- Can Keep Any Plant Alive
- Most Likely to Cry at Commercials
- Can Quote Any Episode of Grey’s Anatomy
- Best Hugger
For kids:
- Star Reader
- Best Helper
- Art Superstar
- Kindness Champion
- Math Wizard
- Most Enthusiastic Snacker
For teachers:
- Most Patient Human Alive
- Angel on Earth
- Queen of the Classroom
- Couldn’t Grow Without You
For birthdays:
- Officially [Age]
- Birthday Girl
- Birthday Boy
- Happy Birthday to Me!
How to Set Up a DIY Award Badge Craft Station
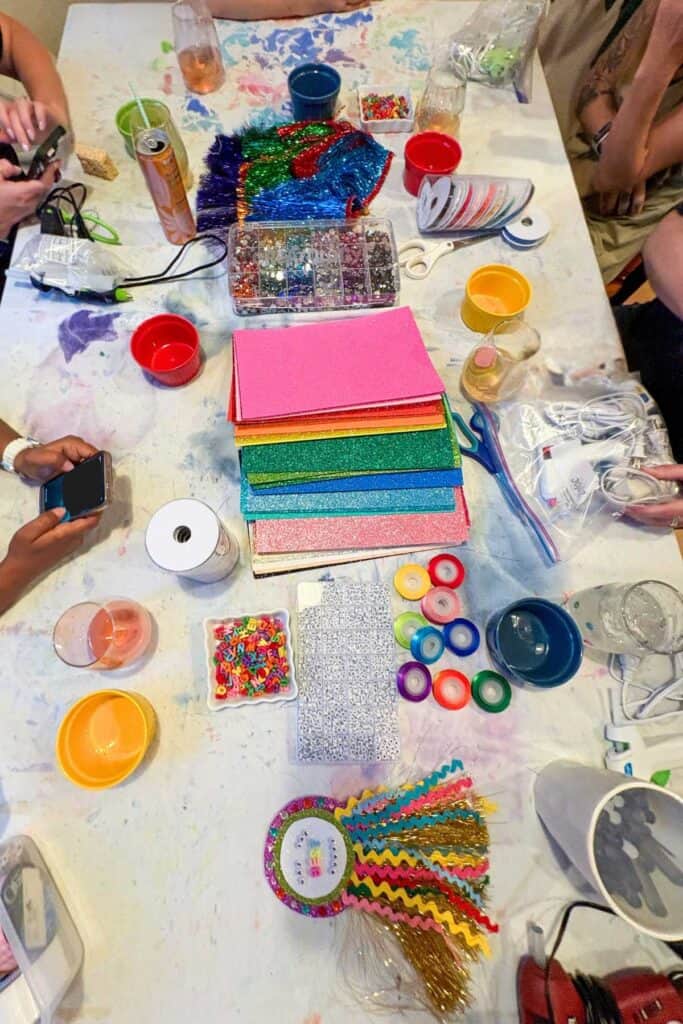
Whether you’re doing this at home, in a classroom, or at a party, the setup makes all the difference.
One thing I love about this craft is that it’s low-prep. The letter beads come in a pre-sorted container so you can find your letters easily, and cutting your own circles freehand is part of the fun because no two badges end up exactly the same.
When everything is laid out and organized and colorful, it practically invites people to sit down and start creating. At craft night, people were at the table for almost two hours and nobody wanted to leave. That is the magic of a good open-ended craft — there’s no rush, no pressure, and the conversation just flows while everyone makes something completely personal and special.
Why Handmade Badges Make the Best Gifts
There is something really special about handing someone something handmade (and sparkly) that was made just for them.
It says: I thought about you.
I know you.
I see what you do every day.
A “World’s Best Dog Mom” badge or a “Most Patient Teacher” badge is extra special because it’s something people can keep on their desk, stick in a little frame, or hang somewhere they’ll see it every single day.
And while you have your foam out, try some of these darling activities, too:
Frequently Asked Questions
Most badges come together in about 20-30 minutes, which makes this a perfect craft night activity. Once you get the hang of cutting your circles and layering your ribbon fringe, you’ll be cranking them out even faster!
Yes! This craft works across a really wide age range. Younger kids can choose their beads and press jewels into glue with a little adult help on the hot glue gun. Older kids can design and assemble the whole thing independently. It’s a great classroom activity, birthday party craft, or rainy day project at home.
A hot glue gun is definitely the easiest and most secure way to assemble these, but strong craft glue works too, it just takes longer to dry. For younger kids, foam adhesive dots are a great no-heat option for attaching the layers and decorations.


LEAVE A COMMENT