

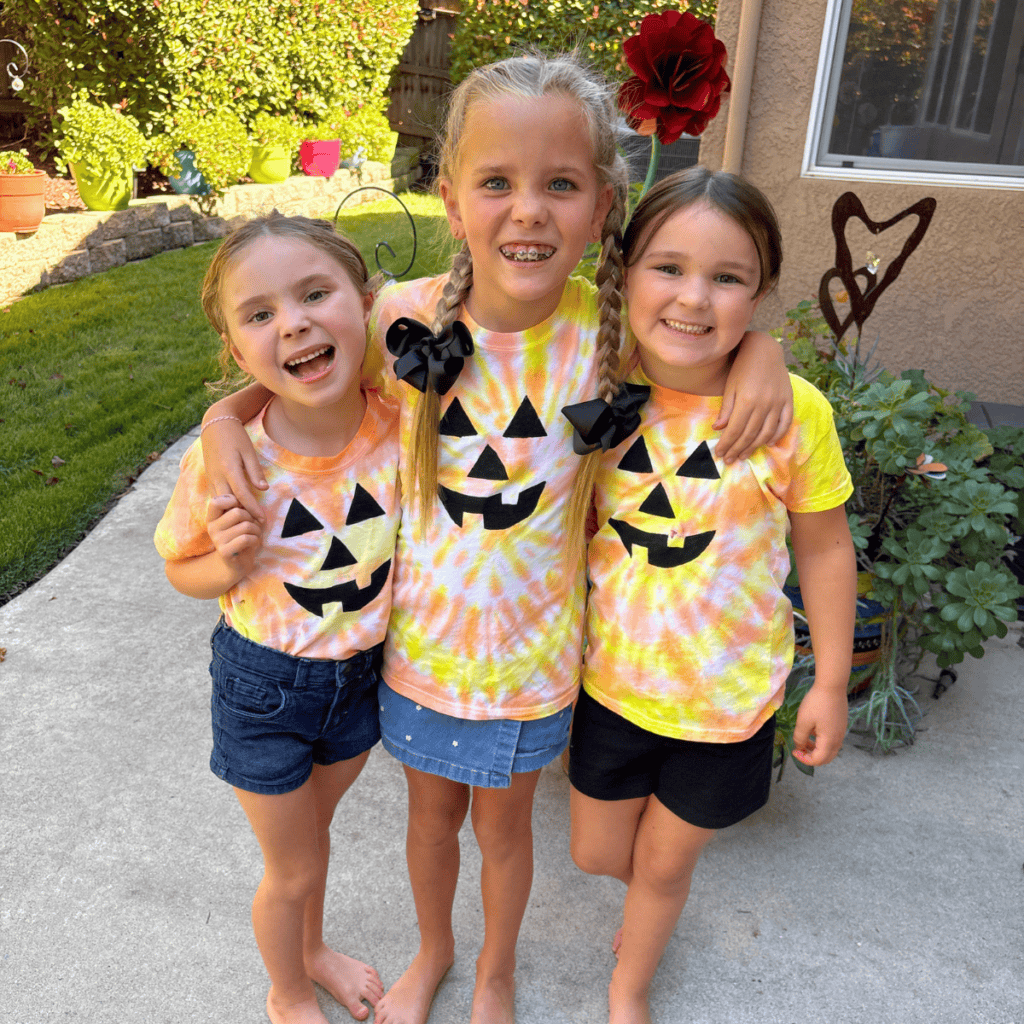
Jack-o-lantern Halloween tie-dye shirts are one of my oldest and best Halloween projects, and after years of posting these on Instagram, I finally sat down and wrote out the whole thing step by step. Grab a white shirt, some orange and yellow dye, and a free pumpkin stencil, and you’ve got the whole project covered.
- Why jack-o-lantern Halloween tie-dye shirts are the best
- Jack-o-lantern Halloween tie-dye shirts are very easy to make!
- Materials
- How to make jack-o-lantern Halloween tie-dye shirts
- Picking the right stencil size (two options included)
- Why I like a sponge more than I like a paintbrush for Halloween tie-dye
- Making your shirt last past Halloween
- Frequently Asked Questions
Why jack-o-lantern Halloween tie-dye shirts are the best
I started posting these on Instagram years ago, back when I was still teaching preschool, and every year people make them and share photos with me!
It began as a classroom project where I’d do the dyeing part with my students and then paint the faces on myself once they were dry.
People kept asking for the steps in the comments for years, so here we are!
The process really hasn’t changed much since that first batch: twist, band, dye, and finish with a stenciled face.
🎃 Related: Check out this spooktacular list of the 50+ best Halloween activities for kids!
Jack-o-lantern Halloween tie-dye shirts are very easy to make!
There are really just two stages here.
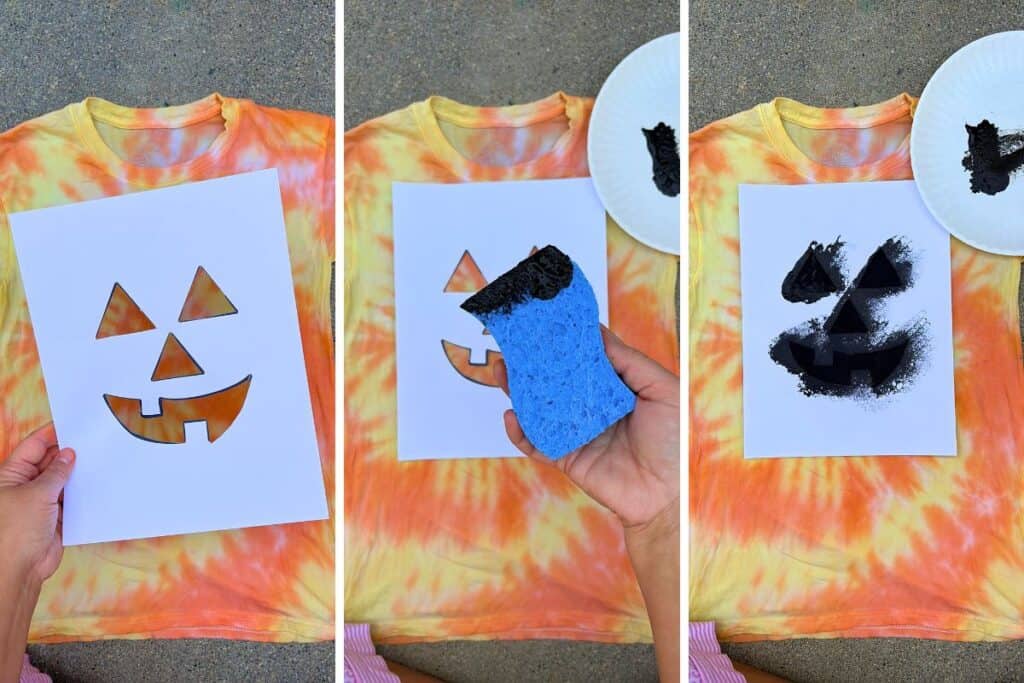
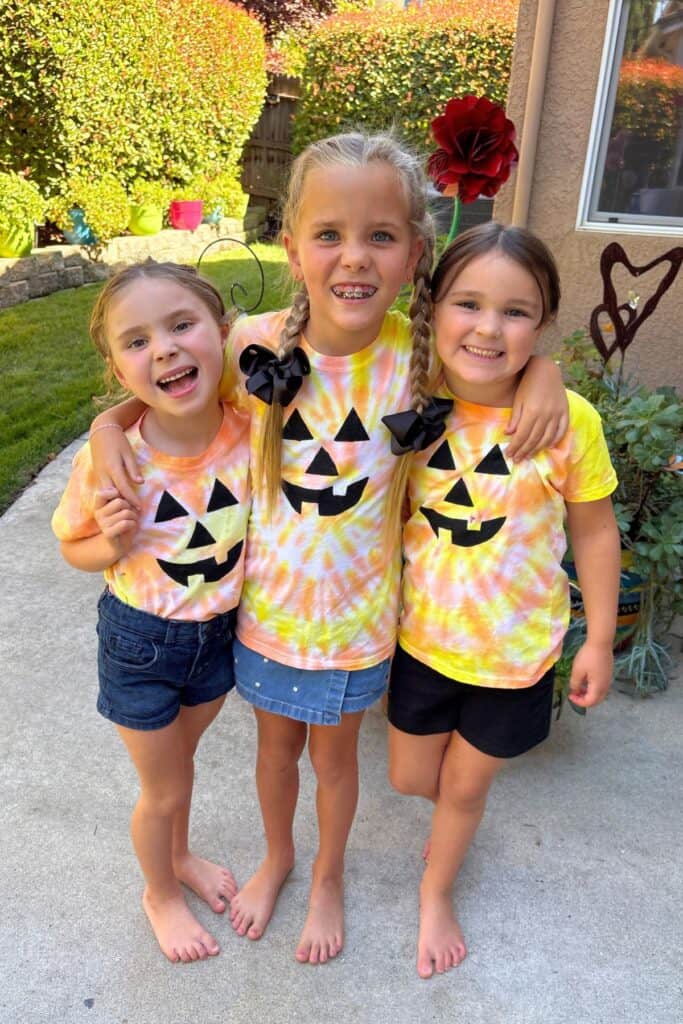
You dye the shirt first, in that orange-and-yellow swirl, then once it’s dry you stencil on the jack-o-lantern face with a sponge and some black paint.
I usually do the dyeing one day and the painting the next, mostly because the shirt needs to be completely dry before the stencil step, but you could knock it all out in one long afternoon if you’re feeling fancy.


Materials
Friends Art Lab is a participant in the Amazon Services LLC Associates Program, an affiliate advertising program. As an Amazon Associate, I earn from qualifying purchases. Read more about these links in my disclosure policy.
- White cotton t-shirt (here’s a small two-pack and a big seven-pack)
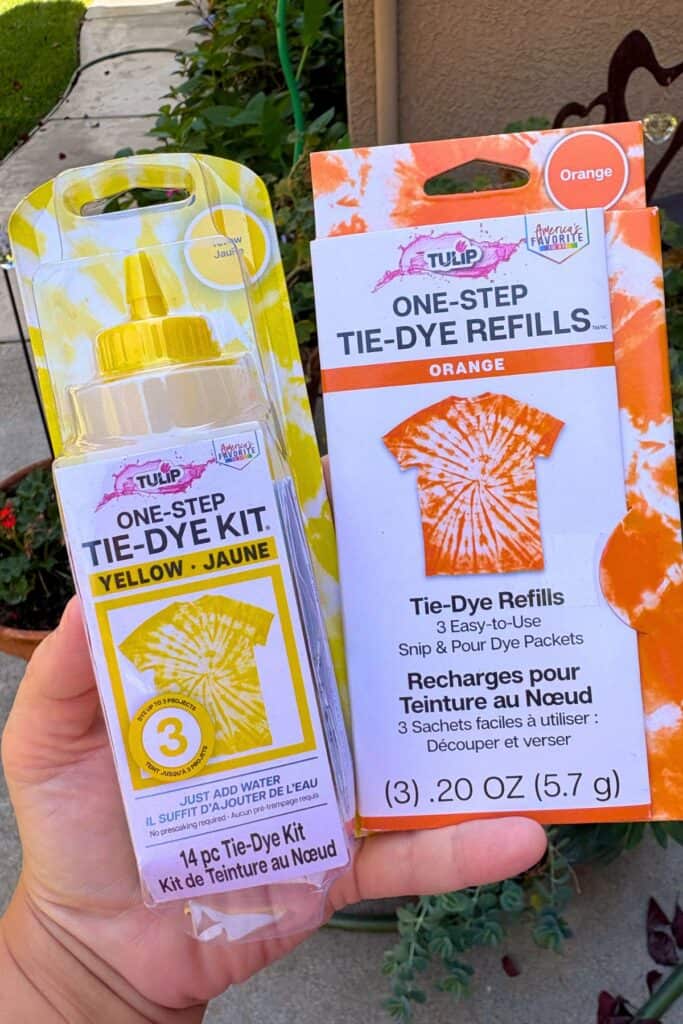
- Orange and yellow tie-dye – depending on how many shirts you are making, there are TONS OF OPTIONS for the dye:
- Individuals: individual yellow dye or individual orange dye
- Refills: yellow refill and orange refill
- Multi packs: multi pack or large multi pack
- Rubber bands
- Gloves (included in most tie-dye multi kits)
- Plastic bag
- Free downloadable jack-o-lantern stencil (includes both kid- and adult-size)
- Black acrylic paint or black fabric paint
- Damp sponge or sponge brush
- Scissors
- Cardboard, poster board, or paper grocery bag to slide inside the shirt
- Small paintbrush (optional)
- Sink
- Washing machine


How to make jack-o-lantern Halloween tie-dye shirts
- Wash your white cotton shirt, but skip the dryer. It needs to still be damp for the dye to take properly.
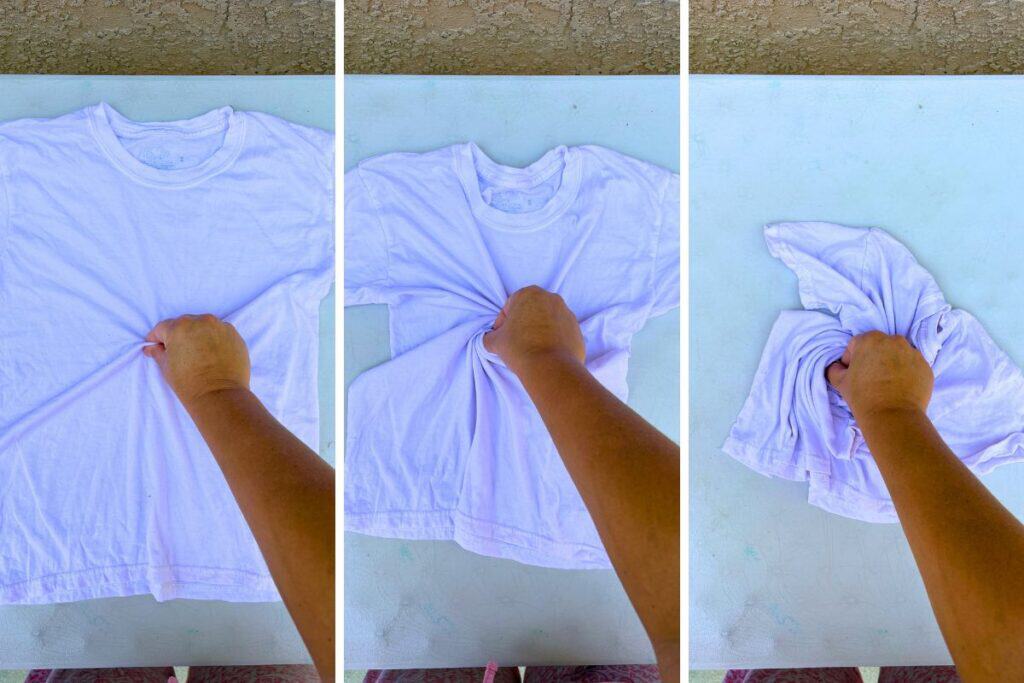
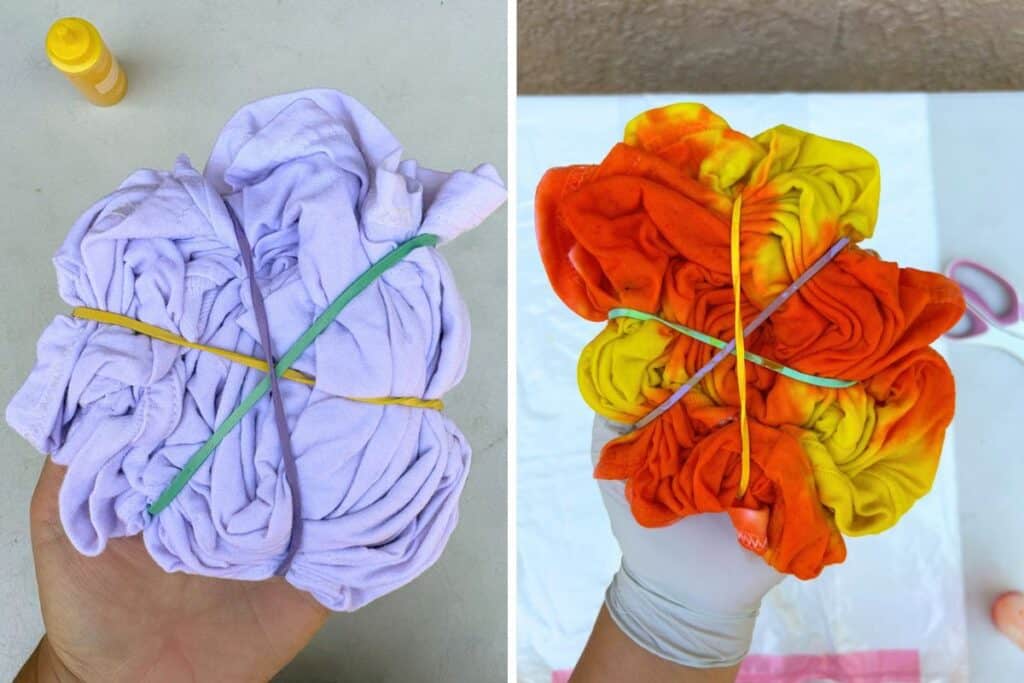
- Lay the shirt flat, pinch the center, and spin clockwise. Spin it around until it twists into a spiral. Wrap rubber bands around the spiral in a few different directions to hold everything in place (I usually use three rubber bands per shirt, regardless of kid vs adult size).
- Mix your orange and yellow dye following the package directions, then apply it to the spiral, alternating the colors so they blend together.
- Let the dye sit for as long as the package says, then rinse the shirt in the sink until the water runs mostly clear.
- Run the shirt through the washing machine on its own to get out any dye that’s left.
- Dry it completely.
- Print and cut out the jack-o-lantern stencil, cutting out the eyes, nose, and mouth.
- IMPORTANT: Add a piece of cardboard, poster board, or paper garbage bag inside of the shirt before you paint! This will prevent the paint from bleeding through to the back of the shirt.
- Lay the stencil where you want the face, then dab black paint on with a sponge over the cut out areas. (You could use a paintbrush, but the sponge makes it a little easier).
- Peel the stencil off right away. I often like to go back in with a small paintbrush to sharpen edges.
- Let the shirt dry completely, then wear and show it off!
Picking the right stencil size (two options included)
The free jack-o-lantern stencil comes in two sizes!
The smaller face fits kid and youth shirts without looking lost on the fabric, and the larger one is scaled for adult sizes.
Alternatively, you could sketch out where you want the face to go with pencil and paint in with paint.
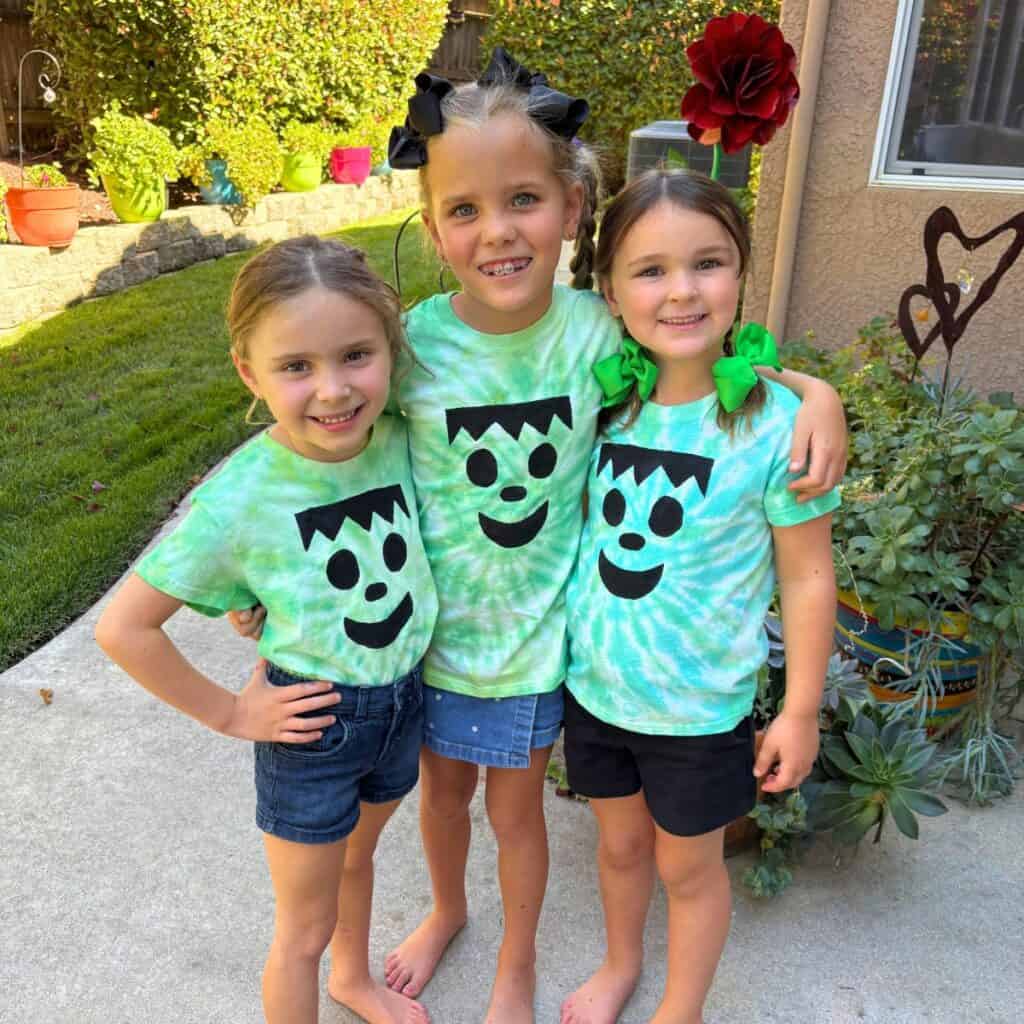
💚 BONUS: The free stencil printables also come with Frankenstein stencils to make a Frankenstein tie-dye version, too:
Why I like a sponge more than I like a paintbrush for Halloween tie-dye
I’ve tried both, and a sponge wins every time for this step.
A brush pushes paint under the edges of the stencil and blurs the lines.
A sponge just dabs it on, so the paint stays where the cutout is and you end up with crisper eyes, nose, and mouth instead of a smudgy mess.
Making your shirt last past Halloween
These hold up fine year to year if you take care of them.
Wash inside out in cold water, and skip the bleach and fabric softener since both fade tie-dye faster than normal washing does.
Fold them away with your other fall clothes and they’ll be ready to pull back out next fall, too!
Frequently Asked Questions
Cotton or another natural fiber takes dye best. A shirt with a lot of polyester in it won’t hold color nearly as well.
How long should I leave the dye on?
That depends on your kit, so check the package because setting times vary by brand.
Black fabric paint is probably a little more flexible, but I have always only ever used black acrylic paint because it’s permanent, inexpensive, and something I already have on hand.


LEAVE A COMMENT